Have you ever wished for a snack that’s both delicious and nutritious? Something you can grab on busy mornings or during a hectic day? Making your own snacks at home is a game-changer. You get to control the ingredients, ensuring every bite is fresh and wholesome.
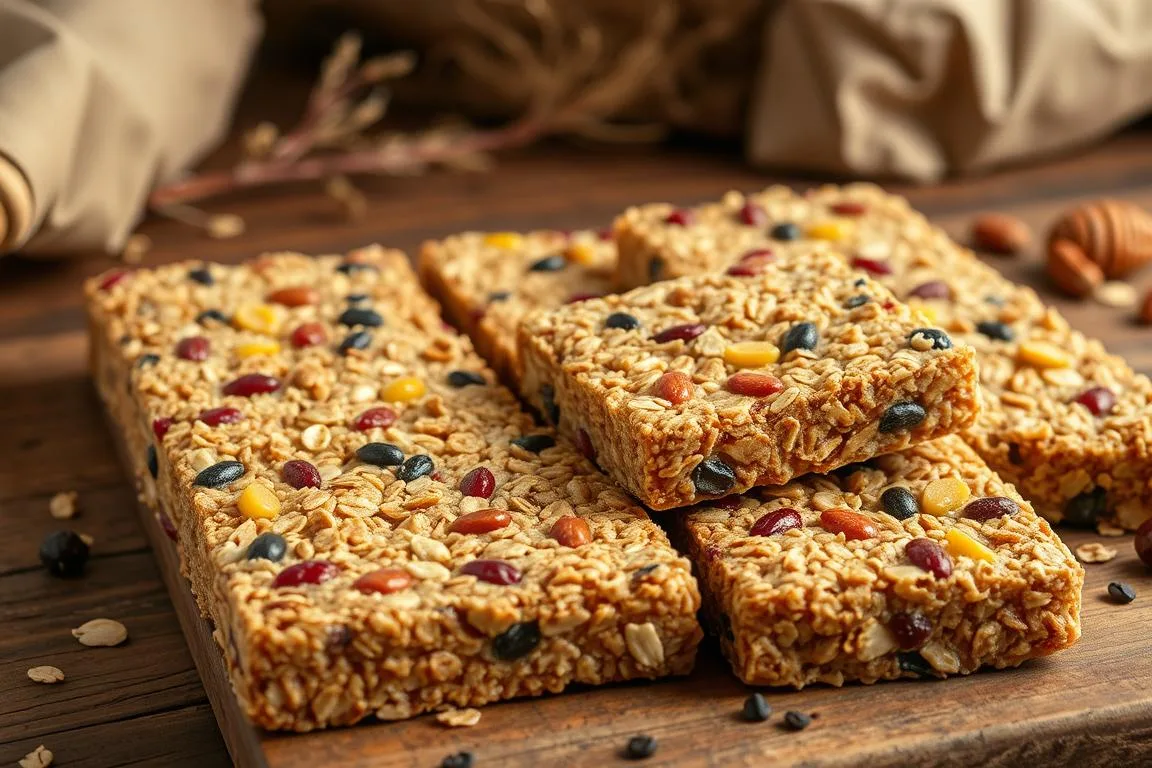
Store-bought options often come packed with preservatives and added sugars. But when you make your own, you can choose what goes in. Imagine a chewy, sweet treat loaded with your favorite mix-ins, like mini chocolate chips or dried fruit. It’s the perfect balance of flavor and nutrition.
These homemade snacks are not just for breakfast. They’re ideal for on-the-go energy, whether you’re heading to work, school, or a workout. Plus, the recipe is simple and uses common kitchen tools. Ready to create something amazing? Let’s get started!
Introduction: Rediscovering the Joy of Homemade Granola Bars
Remember the joy of unwrapping a snack that felt like a treat and a meal in one? For many, store-bought options were a staple of childhood. But as you grow older, you start to notice the hidden ingredients—preservatives, artificial flavors, and excessive sugars. That’s when the journey to creating your own begins.
Making your own snacks allows you to relive those nostalgic moments while improving the quality of what you eat. You can swap out the processed ingredients for fresh, wholesome ones. Think oats, honey, and your favorite mix-ins like mini chocolate chips or dried fruit. The result? A snack that’s not only delicious but also tailored to your taste and nutritional needs.
The Journey from Store-Bought to Homemade
Store-bought snacks often lack the richness and texture you crave. When you make your own, you can achieve the perfect balance of chewy and crunchy. Plus, you have the freedom to experiment with flavors. Want a hint of cinnamon? Add it. Prefer a touch of sea salt? Go for it. The possibilities are endless.
Here’s a quick comparison of store-bought versus homemade:
| Aspect | Store-Bought | Homemade |
|---|---|---|
| Ingredients | Preservatives, artificial flavors | Fresh, natural ingredients |
| Sweetness | High sugar content | Adjustable sweetness |
| Texture | Often dry or overly chewy | Customizable texture |
By making your own, you’re not just creating a snack—you’re crafting an experience. It’s a way to reconnect with simpler times while enjoying a healthier, tastier option. Ready to take the first step? Let’s dive into the process.
Health Benefits and Customization Options
Looking for a snack that fuels your day without compromising on taste? Crafting your own snacks allows you to enjoy the best of both worlds—nutrition and flavor. By choosing wholesome ingredients, you can create a treat that’s as good for your body as it is for your taste buds.

Nutritional Benefits of a Homemade Snack
Whole rolled oats are a powerhouse of fiber and protein, keeping you full and energized. Natural nut butter adds healthy fats and a creamy texture, while honey provides natural sweetness without refined sugars. Together, these ingredients create a balanced snack that supports your energy levels and overall health.
Here’s why these ingredients work so well:
- Oats: Rich in fiber, they aid digestion and keep you satisfied longer.
- Nut Butter: Packed with healthy fats and protein, it’s a great source of sustained energy.
- Honey: A natural sweetener that adds flavor without the crash of refined sugars.
Endless Customization Ideas
One of the best parts of making your own snacks is the ability to customize them. Swap out ingredients to match your dietary needs or preferences. For a vegan option, use maple syrup instead of honey and choose plant-based butter. Add your favorite mix-ins like mini chocolate chips, dried fruit, or nuts for extra flavor and texture.
Here are some ideas to get you started:
- Add dried cranberries and almonds for a sweet and crunchy combo.
- Mix in dark chocolate chips for a rich, indulgent twist.
- Try shredded coconut and chia seeds for a tropical vibe.
With so many options, you can create a snack that’s uniquely yours. Whether you’re looking for a quick breakfast or a post-workout boost, these customizable treats have you covered.
Essential Ingredients for a Nutritious Granola Bar
Discover the key ingredients that transform a simple snack into a powerhouse of energy. The right combination of wholesome elements ensures both flavor and nutrition. Let’s break down what you’ll need and why each component matters.

The Role of Oats, Honey, and Nut Butters
Oats are the foundation of this recipe. They provide a chewy texture and are rich in fiber, keeping you full longer. Opt for whole rolled oats for the best results. If you’re gluten-sensitive, certified gluten-free oats are a great alternative.
Honey acts as a natural sweetener and binder. It adds a touch of sweetness without refined sugars and helps hold the mixture together. For a vegan option, swap honey with maple syrup.
Nut butters, like almond or peanut butter, contribute healthy fats and protein. They also enhance the creamy texture and ensure the snack stays cohesive. Choose natural, unsweetened varieties for a healthier choice.
Add-Ins: Chocolate Chips, Nuts, and Dried Fruits
Add-ins bring variety and extra flavor to your snack. Mini chocolate chips add a sweet, indulgent touch, while nuts like almonds or walnuts provide crunch and protein. Dried fruits, such as cranberries or raisins, offer natural sweetness and a chewy texture.
Here’s a quick guide to popular add-ins:
- Mini Chocolate Chips: Perfect for a sweet treat.
- Almonds or Walnuts: Add crunch and healthy fats.
- Dried Cranberries or Raisins: Bring natural sweetness and chewiness.
Practical Tips for Perfect Results
Measuring ingredients accurately is crucial. Use a standard measuring cup for consistency. When mixing, ensure the honey and nut butter are evenly distributed to bind the mixture effectively. Press the mixture firmly into your pan to avoid crumbly results.
| Ingredient | Measurement | Substitution |
|---|---|---|
| Oats | 2 cups | Gluten-free oats |
| Honey | 1/2 cup | Maple syrup |
| Nut Butter | 1/2 cup | Seed butter (e.g., sunflower) |
| Mini Chocolate Chips | 1/4 cup | Dark chocolate chunks |
With these ingredients and tips, you’re ready to create a snack that’s both delicious and nutritious. Experiment with flavors and textures to make it uniquely yours!
Step-by-Step Process for Making Healthy Homemade Granola Bars
Ready to create a snack that’s both easy to make and packed with flavor? Follow these simple steps to craft a treat that’s as nutritious as it is delicious. With just a few minutes of preparation, you’ll have a snack ready to enjoy.
Mixing the Dry and Wet Ingredients
Start by combining your wet ingredients. In a large bowl, mix nut butter, honey, and a splash of vanilla extract. Stir until smooth. This mixture will act as the binder for your snack.
Next, add the dry ingredients. Incorporate whole rolled oats and your favorite mix-ins, like mini chocolate chips or dried fruit. Stir thoroughly to ensure every ingredient is evenly coated.

Pressing and Chilling for a Cohesive Snack
Transfer the mixture to a lined baking pan. Use a spatula or your hands to press it firmly into the pan. This step is crucial for ensuring your snack holds together.
Chill the mixture in the refrigerator for at least one hour. This allows the ingredients to set and makes it easier to cut into even pieces. For best results, let it chill overnight.
Here’s a quick guide to the process:
| Step | Time | Tips |
|---|---|---|
| Mix Wet Ingredients | 5 minutes | Ensure nut butter and honey are well combined. |
| Add Dry Ingredients | 5 minutes | Stir until evenly coated. |
| Press into Pan | 2 minutes | Press firmly to avoid crumbly results. |
| Chill | 1 hour | For best results, chill overnight. |
With these steps, you’ll have a snack that’s perfect for any time of day. Experiment with different ingredients to make it uniquely yours!
Essential Equipment for a Smooth Preparation
Having the right tools in your kitchen can make all the difference when preparing a wholesome snack. The right equipment ensures even mixing, proper pressing, and a cohesive final product. Let’s explore the must-have items for a seamless preparation process.
Must-Have Kitchen Tools and Baking Essentials
Start with a sturdy baking pan. A 9×9-inch pan is ideal for creating evenly sized snacks. Line it with parchment paper to prevent sticking and make removal easier. This simple step saves time and ensures clean edges.
Next, a mixing bowl is essential for combining your ingredients. Choose one large enough to hold all your dry and wet components without spilling. A reliable measuring cup and spatula are also crucial for accuracy and even mixing.
If you don’t have parchment paper, wax paper or a lightly greased pan can work as substitutes. For pressing the mixture, a clean spatula or the bottom of a glass can achieve the same result as a specialized tool.
Here’s a quick guide to the essential equipment:
| Tool | Purpose | Substitution |
|---|---|---|
| Baking Pan | Shapes and holds the mixture | Any flat, oven-safe dish |
| Parchment Paper | Prevents sticking | Wax paper or greased pan |
| Mixing Bowl | Combines ingredients | Large container |
| Measuring Cup | Ensures accurate portions | Scale or estimation |
| Spatula | Mixes and presses | Bottom of a glass |
Investing in these tools streamlines the process and helps you achieve professional-quality results. Whether you’re making a quick breakfast snack or a post-workout treat, the right equipment ensures success.
Techniques to Achieve Perfect Texture and Flavor
Want to master the art of creating a snack with the perfect balance of texture and taste? It all comes down to a few key techniques. From toasting oats to precise chilling, these methods ensure every bite is just right.

Toasting Oats for Enhanced Flavor
Start by toasting your oats. This simple step brings out their natural nuttiness and adds depth to the overall flavor. Spread the oats evenly on a baking sheet and toast them in the oven at 350°F for 8-10 minutes. Keep an eye on them to avoid burning.
Even Mixing for Balanced Texture
When combining your ingredients, stir thoroughly to ensure an even distribution. This prevents clumps and ensures every bite has the right mix of oats, dried fruit, and other add-ins. Use a spatula to fold the mixture gently but firmly.
Chilling for the Perfect Chew
After pressing the mixture into the pan, let it chill in the fridge for at least an hour. This step is crucial for achieving a chewy consistency. The cold temperature helps the ingredients bind together, making it easier to cut into neat pieces.
Balancing Sweet and Savory
To create a snack that’s not too sweet, balance honey or chocolate chips with savory elements like nuts or a pinch of sea salt. This contrast enhances the overall flavor and keeps things interesting.
Using Parchment Paper Effectively
Line your pan with paper to prevent sticking and ensure easy removal. Press the mixture firmly into the pan for uniform thickness. This step guarantees clean edges and a professional finish.
With these techniques, you’ll create a snack that’s both delicious and satisfying. Experiment with different combinations to find your perfect match!
Quick Tips for Binding and Chilling Success
Binding and chilling are the secrets to a cohesive snack—learn how to master them. The right techniques ensure your mixture holds together and delivers the perfect texture every time. Let’s dive into actionable tips to make the process seamless.
Binding Tips and Quick Fixes
Choosing the right nut butter consistency is key. Opt for creamy varieties that blend easily with other ingredients. If your mixture feels too dry, add a splash of honey or a teaspoon of water to improve binding. A pinch of salt can also enhance the flavors while helping the ingredients stick together.

When pressing the mixture into the pan, use parchment paper to ensure even distribution and prevent sticking. Press firmly with a spatula or your hands to create a uniform texture. If the mixture crumbles, let it sit for a few minutes before pressing again—this allows the ingredients to bind naturally.
Chilling is the final step to success. Allow the mixture to set in the fridge for at least one hour. This time is crucial for achieving a chewy, cohesive texture. For best results, chill overnight. If you’re in a hurry, 30 minutes in the freezer can speed up the process.
Here’s a quick checklist for binding and chilling success:
- Use creamy nut butter for better binding.
- Add honey or water if the mixture feels dry.
- Press firmly with parchment paper for even texture.
- Chill for at least one hour to set the mixture.
With these tips, you’ll create a snack that’s not only delicious but also perfectly textured. Take your time with each step, and enjoy the results!
Variations and Mix-In Ideas for Homemade Granola Bars
Curious how small tweaks can transform your go-to treat? Experimenting with mix-ins lets you create unique flavors while keeping the process simple. Whether you’re adding a teaspoon of spice or swapping ingredients, these ideas will inspire your next batch.
Start by trying different dried fruits. Dried cranberries add a tangy sweetness, while raisins or apricots bring chewy texture. For a tropical twist, mix in shredded coconut or diced pineapple. These swaps keep the base recipe intact while adding variety.
Chocolate lovers can experiment with sizes. Mini chips distribute evenly, while chunks create rich pockets of flavor. Add a teaspoon of extra vanilla extract for depth, or sprinkle in cinnamon for warmth. These small changes make a big difference.
Nuts and seeds are another great option. Chopped pecans or almonds add crunch, while chia or flax seeds boost nutrition. When you press mixture into the pan, ensure these add-ins are evenly spread for consistent texture.
For a festive touch, try dried cranberry and white chocolate. Or combine dark chocolate with orange zest for a citrusy kick. The possibilities are endless, so don’t be afraid to get creative.
Remember, small adjustments like a teaspoon of spice or a handful of cranberry can elevate your snack. Stick to the core steps, but feel free to personalize. Your next batch could be your best yet!
Storing and Serving Your Delicious Granola Bars
Keeping your snacks fresh and flavorful is easier than you think. Proper storage ensures they stay chewy and delicious, whether you’re enjoying them now or saving them for later. Here’s how to store and serve them like a pro.
Storage Best Practices for Freshness
To maintain freshness, store your snacks in an airtight container. Place them in the fridge for up to two weeks. This keeps the texture intact and prevents them from drying out.
For longer storage, freezing is a great option. Wrap each piece individually in parchment paper to avoid sticking. Then, place them in a freezer-safe bag or container. They can last up to three months in the freezer without losing flavor.
When ready to enjoy, thaw frozen snacks in the fridge overnight. This helps them retain their chewy texture. Avoid microwaving, as it can make them too soft or crumbly.
Serving Tips for Maximum Enjoyment
Before serving, let refrigerated snacks sit at room temperature for 10 minutes. This brings out their natural flavors and makes them easier to bite into. Pair them with fresh fruit or a handful of pecans for a balanced snack.
For added flair, drizzle a bit of melted chocolate or a sprinkle of vanilla extract on top. These small touches elevate the experience and make every bite special.
| Storage Method | Duration | Tips |
|---|---|---|
| Refrigerator | Up to 2 weeks | Use airtight containers. |
| Freezer | Up to 3 months | Wrap in parchment paper. |
With these tips, your snacks will stay fresh and delicious, ready to enjoy whenever you need a quick bite. Experiment with serving ideas to make them even more enjoyable!
Troubleshooting Common Issues in Granola Bar Making
Ever faced a snack that falls apart or lacks flavor? Let’s fix that. Even the best recipes can have hiccups, but with a few adjustments, you can achieve the perfect texture and taste. Here’s how to tackle common problems and elevate your results.
How to Fix Crumbly Bars
Crumbly bars often result from insufficient binding. If your mixture doesn’t hold together, try re-stirring it. Add a bit more honey or nut butter to improve cohesion. Press the mixture firmly into the pan to ensure it sets properly.
Another tip is to chill the mixture longer. Let it sit in the fridge for at least two hours, or overnight for best results. This allows the ingredients to bind tightly, preventing crumbles.
Enhancing Flavor with Simple Adjustments
If your snack tastes bland, small tweaks can make a big difference. Add a teaspoon of vanilla extract or a pinch of sea salt to boost flavor. For a sweeter touch, mix in mini chocolate chips or dried fruit.
Experiment with ingredient ratios. A bit more honey can enhance sweetness, while a dash of cinnamon adds warmth. These adjustments are quick but impactful.
Finally, store your snacks properly to preserve flavor. Keep them in an airtight container in the fridge for up to two weeks. For longer storage, wrap them individually and freeze.
With these solutions, you’ll turn potential mishaps into delicious successes. A little patience and creativity go a long way in perfecting your recipe.
Conclusion
Creating your own snacks from scratch is a rewarding and healthy choice. With just a few basic ingredients like oats, honey, and nut butter, you can craft a treat that’s both nutritious and delicious. The process is simple—mix, press, and chill—and the results are worth it.
One of the best parts is the ability to personalize. Add a tablespoon of vanilla extract for depth or toss in your favorite mix-ins for variety. Proper chilling in the freezer ensures a perfect texture, while pressing firmly guarantees a cohesive snack.
Experiment with flavors and share your successes. Whether you’re storing them for a month or enjoying them fresh, these snacks are a healthier, tastier alternative to store-bought options. Start crafting your own today and savor the difference!
FAQ
What are the key ingredients for making healthy granola bars?
The essential ingredients include oats, honey, and nut butter. You can also add chocolate chips, nuts, and dried fruits for extra flavor and texture.
How do I achieve the perfect chewy texture in my bars?
To get a chewy texture, ensure you press the mixture firmly into the pan and chill it for at least an hour. This helps bind the ingredients together.
Can I customize the flavors in my granola bars?
Absolutely! You can mix in ingredients like mini chocolate chips, dried cranberries, or pecans to create unique flavors that suit your taste.
What’s the best way to store homemade granola bars?
Store them in an airtight container at room temperature for up to a week or in the fridge for longer freshness. You can also freeze them for up to a month.
Why are my granola bars crumbly?
Crumbly bars often result from insufficient binding. Add a bit more honey or nut butter to the mixture and press it firmly into the pan before chilling.
Can I use parchment paper when making granola bars?
Yes, lining your pan with parchment paper makes it easier to remove the bars after chilling and ensures they hold their shape.
How can I balance sweet and savory flavors in my bars?
Use a mix of ingredients like honey for sweetness and nuts or seeds for a savory touch. Adjust the ratios to suit your preference.
What kitchen tools are essential for making granola bars?
You’ll need a mixing bowl, a baking pan, parchment paper, and a spatula. A food processor can also help blend ingredients more evenly.
Can I make granola bars without honey?
Yes, you can substitute honey with maple syrup or agave nectar for a similar binding effect and sweetness.
How long do homemade granola bars take to prepare?
The preparation time is about 15 minutes, plus an hour for chilling. It’s a quick and easy recipe for a nutritious snack.