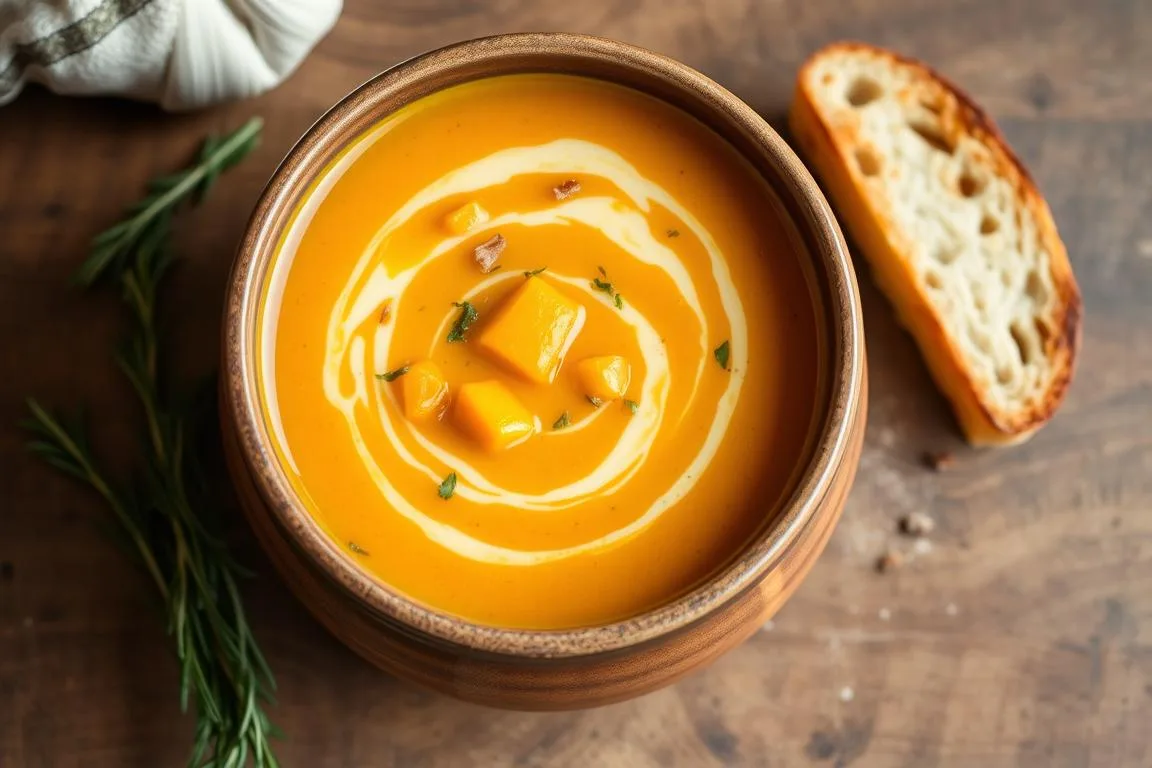
There’s something magical about a warm bowl of butternut squash soup on a crisp fall or winter day. It’s more than just a meal—it’s a comforting embrace that brings joy to your table. If you’ve been searching for a dish that’s both easy to make and packed with nutrients, this recipe is for you.
This ultra-creamy soup has become a reader favorite, earning over 500 five-star reviews. Its rich flavor comes from roasting the butternut squash, which enhances its natural sweetness. With just a few simple ingredients and a single pot, you can create a dish that’s perfect for busy weeknights or cozy gatherings.
Whether you’re new to cooking or a seasoned pro, this recipe is designed to be straightforward and rewarding. Plus, it’s a great make-ahead option for meal prep. Ready to warm up your kitchen and your heart? Let’s dive into the details of this delicious creation.
Overview of a Cozy Butternut Squash Soup
When the air turns crisp, nothing beats the warmth of a hearty dish. This squash soup is a fall favorite, blending rich flavors with a creamy texture. Its appeal lies in its simplicity and the depth of flavor achieved through roasting.

What Makes This Soup a Fall Favorite
Roasting the main ingredient brings out its natural sweetness. The caramelization process deepens the flavor, making it a standout dish. Pair it with traditional fall meals, and you’ve got a winner for any autumn gathering.
Nutritional Benefits and Seasonal Appeal
This dish is not just delicious—it’s packed with nutrients. Vitamins from the squash and additional vegetables make it a healthy choice. Its seasonal appeal ties it to holiday menus and autumn traditions.
To achieve the perfect consistency, an immersion blender or stand blender is key. These tools ensure a smooth, creamy finish. A pinch of salt and a touch of cream elevate the flavor without overpowering it.
| Nutrient | Benefit |
|---|---|
| Vitamin A | Supports eye health |
| Vitamin C | Boosts immunity |
| Fiber | Aids digestion |
This squash soup is a perfect blend of taste and health. Its simplicity and seasonal charm make it a must-try for cooler months.
Essential Ingredients & Preparation Tips
The secret to a flavorful meal lies in quality ingredients and smart techniques. With just a handful of essentials, you can create a dish that’s both rich and satisfying. Let’s break down what you’ll need and how to prepare them for the best results.
Simple Ingredients for Rich Flavor
This dish relies on a few key components to let the natural sweetness shine. You’ll need:
- Oil: A tablespoon of olive or avocado oil for sautéing.
- Garlic: Fresh cloves add depth and aroma.
- One cup of vegetable broth for a smooth base.
Using high-quality ingredients ensures a balanced, delicious outcome without overwhelming the palate.

Prepping the Main Ingredient and Aromatics
Start by peeling and chopping the main ingredient into even pieces. This ensures even roasting and a consistent texture. Heat a tablespoon of oil in a pan and sauté minced garlic until fragrant. This step builds a flavorful foundation for your dish.
For added complexity, consider roasting the main ingredient before blending. This enhances its natural sweetness and adds a caramelized note. Combine the roasted pieces with the sautéed aromatics in a bowl for easy mixing.
These simple techniques guarantee a rich, satisfying result without unnecessary complications. With these tips, you’re ready to create a dish that’s both easy and impressive.
Butternut Squash Soup Recipe: Step-by-Step Guide
Creating a flavorful dish starts with mastering the basics of roasting and sautéing. These techniques bring out the natural sweetness and depth of flavor in your ingredients. Follow this guide to achieve a rich, satisfying result that’s perfect for any day of the week.

Roasting Techniques for Caramelized Flavor
Preheat your oven to 400°F (200°C) to ensure even cooking. Line a baking sheet with parchment paper for easy cleanup. Cut the main ingredient into evenly sized pieces to promote consistent roasting.
Arrange the pieces on the baking sheet and drizzle with olive oil. Season with a pinch of ground pepper and a dash of nutmeg for warmth. Roast for 25-30 minutes, flipping halfway through, until the edges are golden and caramelized.
Sautéing Aromatics and Browning Butter
While the main ingredient roasts, heat a tablespoon of butter in a large pot over medium heat. Add minced garlic and a chopped onion, cooking until they turn golden and fragrant. This step builds a flavorful base for your dish.
For a nutty depth, let the butter brown slightly. Stir frequently to prevent burning. Once the aromatics are ready, add the roasted pieces to the pot. Combine everything for a rich, cohesive flavor profile.
Finally, season with a pinch of salt and a clove of garlic for extra depth. Note: Always handle hot ingredients with care to avoid burns. These simple steps ensure a dish that’s both delicious and comforting, especially during the fall season.
Cooking Methods: Stovetop, Crock-Pot, and Instant Pot
Flexibility in cooking methods ensures you can enjoy this dish no matter your schedule. Whether you prefer slow simmering, hands-off cooking, or quick results, there’s a method that fits your lifestyle. Let’s explore the options to help you choose the best approach.

Stovetop Simmering for a Perfect Blend
Using the stovetop allows flavors to meld gradually, creating a rich and cohesive dish. Start by heating a bit of olive oil in a large pot. Add your roasted butternut squash and vegetable broth, then let it simmer on low heat for 20-30 minutes.
This method is ideal if you enjoy being hands-on and want to control the cooking process. Stir occasionally to prevent sticking and ensure even heating. For a creamy finish, add a touch of heavy cream before serving.
Pressure Cooking for Quick Results
If time is tight, the Instant Pot is your best friend. Combine all ingredients, including the roasted butternut squash and vegetable broth, in the pot. Set it to high pressure for 10 minutes, then allow a natural release.
This method is perfect for busy weeknights or when you need a meal in a hurry. The pressure cooker locks in flavors, delivering a dish that tastes like it simmered all day. Garnish with pepita seeds for a crunchy contrast.
| Method | Time | Best For |
|---|---|---|
| Stovetop | 30-40 minutes | Flavor development |
| Crock-Pot | 4-6 hours | Hands-off cooking |
| Instant Pot | 10 minutes | Quick meals |
Each method has its strengths, so choose based on your schedule and preferences. Whether you’re simmering on the stovetop or using a pressure cooker, the result will be a comforting and delicious dish.
Mastering the Blending Process for Creamy Consistency
Achieving the perfect texture for your dish requires mastering the blending process. Whether you’re using an immersion blender or a stand blender, the technique you choose can significantly impact the final result. Let’s explore the best practices to ensure a smooth and velvety finish every time.

Immersion Blender Technique
An immersion blender is a convenient tool for blending directly in the pot. Start by ensuring your ingredients, like roasted butternut and sautéed onion, are fully cooked and softened. Gradually add broth to achieve the desired consistency, blending in small batches if necessary.
Keep the blender submerged to avoid splatters, and move it in slow, circular motions. This method is ideal for quick adjustments and minimal cleanup. However, for an ultra-smooth texture, a stand blender might be more effective.
Stand Blender Best Practices
Using a stand blender can yield a creamier result, especially when working with hot liquids. Transfer your cooked ingredients in small portions, filling the blender no more than halfway. Add a measured amount of broth to help the blending process.
Start on low heat and gradually increase the speed to avoid overheating. Always remove the center cap from the blender lid and cover it with a towel to release steam safely. This prevents pressure buildup and reduces the risk of accidents.
Regardless of the method, mastering the blending process ensures a velvety finish. Adjust the heat and cooking time as needed to prevent a gritty texture. With these tips, you’ll create a dish that’s as smooth as it is delicious.
Creative Variations & Customizations for Your Soup
Transform your dish into a global culinary adventure with creative twists and customizations. Whether you’re craving bold flavors or dietary-friendly options, this recipe is versatile enough to meet your needs. Let’s explore how you can make it uniquely yours.

Incorporating a Thai or Mexican Twist
Add a teaspoon of red curry paste for a Thai-inspired version. This brings a spicy, aromatic depth that pairs beautifully with the natural sweetness of the main ingredient. For a Mexican twist, try chipotle peppers or a dash of cumin for smoky warmth.
These small tweaks can transport your taste buds to different parts of the world. Experiment with fresh herbs like cilantro or Thai basil to enhance the flavor profile further.
Vegan, Gluten-Free, and Dairy-Free Options
This recipe is naturally gluten-free, but you can make it vegan by substituting dairy with coconut milk or almond milk. Use olive oil instead of butter for sautéing to keep it plant-based.
For added tartness, consider blending in a chopped apple. This not only enhances the flavor but also complements the dish’s creamy texture. Adjust the heat level with a pinch of black pepper to suit your preference.
“Cooking is all about creativity. Don’t be afraid to experiment and make the recipe your own.”
Fresh sage or browned butter can serve as both a flavor enhancer and an elegant garnish. These additions elevate the dish, making it perfect for special occasions or everyday meals.
| Variation | Key Ingredients |
|---|---|
| Thai Twist | Red curry paste, coconut milk, cilantro |
| Mexican Twist | Chipotle peppers, cumin, lime juice |
| Vegan Option | Coconut milk, olive oil, apple |
| Gluten-Free | Vegetable broth, gluten-free spices |
Small changes can lead to significant flavor transformations. Whether you’re adjusting the cooking time or adding a unique garnish, these variations ensure your dish stays exciting and delicious.
Conclusion
This dish combines simplicity with rich flavors, making it a must-try for any season. By following the instructions, you’ll master each step—from roasting to blending—ensuring a creamy, satisfying result. Whether you use an immersion blender or experiment with different cooking methods, the process is straightforward and rewarding.
Packed with nutrients like vitamin A and fiber, it’s a healthy choice for fall or winter menus. Its versatility allows you to customize it with spices like pepper or creative twists to suit your taste. The recipe’s flexibility makes it perfect for weeknight dinners or special occasions.
We’d love to hear how you made it your own! Share your tweaks and feedback in the comments below. With its ease and comforting appeal, this recipe is your next go-to for seasonal meals.
FAQ
What makes butternut squash soup a fall favorite?
Its warm, creamy texture and sweet, nutty flavor perfectly capture the essence of autumn. Plus, it’s packed with seasonal ingredients like sage and nutmeg.
What are the nutritional benefits of this soup?
It’s rich in vitamins A and C, fiber, and antioxidants. Using vegetable broth and olive oil keeps it light and healthy.
How do I prep butternut squash for the recipe?
Peel, seed, and cube the squash. Roasting it enhances its natural sweetness and caramelized flavor.
Can I use an immersion blender for a smooth consistency?
Yes, an immersion blender works great for blending directly in the pot. It’s quick and minimizes cleanup.
What’s the best way to add a Thai twist to the soup?
Incorporate coconut milk, red curry paste, and a squeeze of lime for a flavorful Thai-inspired variation.
How can I make this soup vegan or dairy-free?
Substitute heavy cream with coconut cream or cashew cream and use plant-based butter or olive oil.
Can I cook this soup in an Instant Pot?
Absolutely! Pressure cooking reduces the cooking time while still delivering a rich, flavorful result.
What’s the best way to store leftovers?
Store in an airtight container in the fridge for up to 3 days. Reheat gently on the stovetop or in the microwave.
Can I freeze butternut squash soup?
Yes, it freezes well. Let it cool completely, then store in freezer-safe containers for up to 3 months.
What toppings pair well with this soup?
Try roasted pepitas, a drizzle of cream, or a sprinkle of fresh sage for added texture and flavor.