Chocolate Chip Cookies – 10 Proven Tips for Soft & Chewy Perfection
Chef Betty
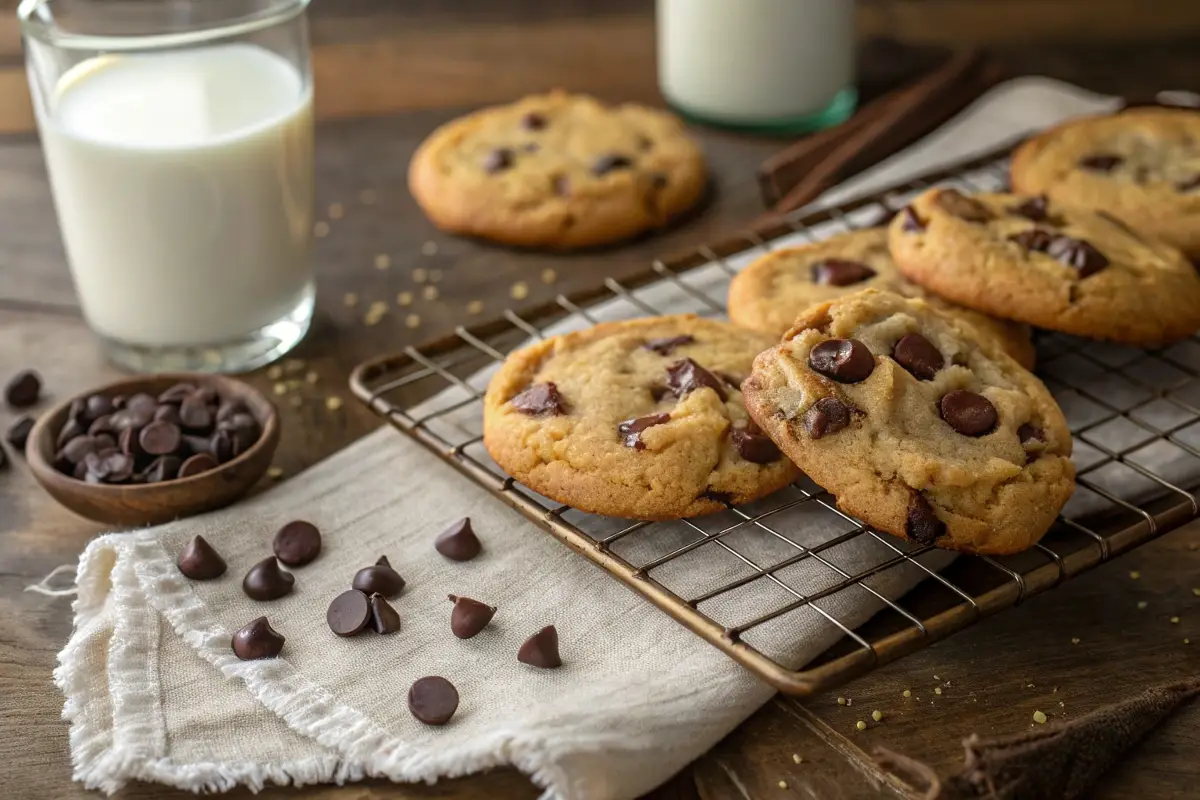
Chocolate Chip Cookies are a timeless treat loved by everyone. There’s something magical about the smell of freshly baked cookies filling your kitchen. Whether you’re baking for a special occasion or just craving something sweet, this chocolate chip cookie recipe delivers perfection every time.
Soft, chewy, and packed with rich chocolate, these cookies are easy to make and require no chilling time. With simple ingredients and the right techniques, you’ll achieve bakery-quality results at home.
What makes this recipe stand out? The balance of brown sugar and white sugar creates the ideal sweetness and texture. Plus, by skipping unnecessary steps, you’ll have warm, gooey chocolate chip cookies ready in no time.
The secret to perfect cookies lies in the balance of ingredients and technique. These treats stand out because of their soft, chewy texture and rich flavor. The combination of brown sugar and regular sugar creates the ideal sweetness, while the cookie dough consistency ensures a perfect bake every time.
Proper ingredient measurement is crucial. Too much flour can make the dough dry, while too little can lead to flat cookies. Mixing the dough for the right amount of time also plays a key role. Overmixing can toughen the dough, so aim for just a few minutes of blending.
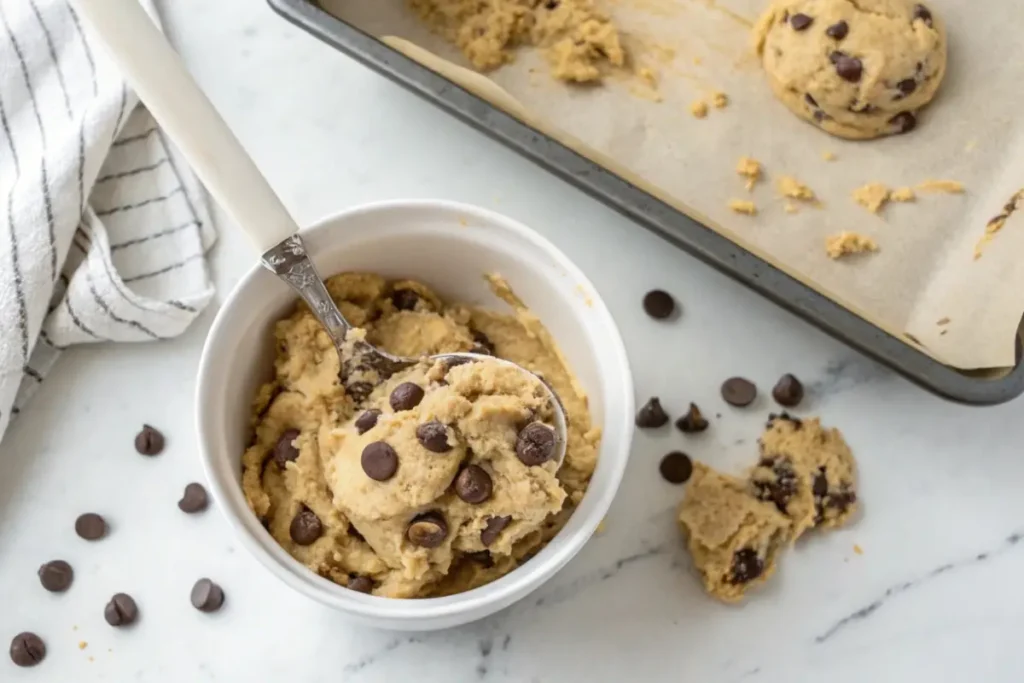
The texture of the dough is what makes these cookies so special. It’s soft enough to scoop but firm enough to hold its shape. This balance ensures that the cookies bake evenly without spreading too much. Plus, there’s no need for excessive chilling, so you can enjoy warm cookies in no time.
Key ingredients like brown sugar, butter, and flour work together to create the perfect dough. Each component plays a role in achieving the desired texture and flavor. With this recipe, you’ll have cookies that are soft, chewy, and absolutely irresistible.
The Story Behind the Recipe
Every recipe has a story, and this one is no exception. It’s a tale of friendship, love, and countless moments shared over a warm treat. This recipe didn’t just happen overnight; it evolved through years of baking and testing. Each ingredient was carefully chosen for its quality and consistency, ensuring every batch is as good as the last.
This recipe became a favorite because of the memories tied to it. Whether it’s a lazy Sunday or a special day, these treats have a way of making everything better. The egg binds the dough perfectly, while the right balance of sugar adds just the right sweetness. It’s a good way to create memories with loved ones.
Spend time baking with loved ones, and you’ll see why this recipe is so special. It’s not just about the ingredients; it’s about the joy it brings. Share your post-baking results and celebrate any day with this treat. After all, some recipes are more than just food—they’re memories in the making.
Ingredients Overview
The foundation of any great recipe starts with the right ingredients. For the perfect bake, every component plays a crucial role. From flour to unsalted butter, each ingredient must be carefully chosen and measured.
Essential Ingredients
Here’s what you’ll need to create the ideal dough:
Flour: Use all-purpose flour for the right structure. Measure it using the spoon-and-level method to avoid dryness.
Butter: Opt for unsalted butter to control the saltiness. Softened butter blends better, ensuring a smooth texture.
Sugars: A mix of granulated sugar and brown sugar creates the perfect balance of sweetness and moisture.
Baking soda: This helps the dough rise slightly, giving it a soft and chewy texture.
Quality Matters
Using high-quality ingredients makes a noticeable difference. For example, fresh baking soda ensures proper rising, while unsalted butter allows you to adjust the salt level to your preference.
Granulated sugar adds crispness, while brown sugar contributes to a soft, moist texture. Together, they create the perfect spread and chewiness. Always start with the best ingredients—your bake will thank you.
Key Tools and Equipment
Having the right tools can transform your baking experience from good to great. Precision and consistency are key, and the right equipment ensures both. Start with the basics: measuring cups, mixing bowls, and a sturdy spatula. These essentials lay the foundation for a smooth process.
A KitchenAid mixer is a game-changer for effortless dough mixing. It saves time and ensures even blending. For portioning dough, a stainless steel cookie scoop is a must. It guarantees uniform size, which leads to even baking on your sheet.
Parchment paper is another lifesaver. It prevents sticking and makes cleanup a breeze. Always line your sheet with it for perfect results. An airtight container is essential for storing leftovers. It keeps your treats fresh and maintains their texture.
Don’t forget a cooling rack. It allows air to circulate, preventing sogginess. Investing in quality tools elevates your baking. With the right equipment, you’ll achieve consistent, delicious results every time.
Mastering Your Cookie Dough Consistency
Achieving the perfect dough consistency is a skill every baker should master. The right balance ensures your treats turn out soft, chewy, and just the way you want them. Two critical factors play a role: measuring flour correctly and achieving the ideal texture.
Measuring Flour Correctly
Properly measuring flour is essential for the perfect dough. Too much flour can make your dough dry, while too little can lead to a sticky mess. Use the spoon-and-level method for accuracy. Spoon flour into a dry measuring cup, then level off the excess with a straight edge.
This technique ensures you get the right amount of flour every time. It’s a simple step that makes a big difference in your bake. Remember, precision is key when working with flour.
Achieving the Right Texture
The texture of your dough is just as important as the ingredients. A slightly sticky dough that’s easy to roll is a sign of success. Overmixing can make the dough tough, while undermixing can leave it uneven. Mix just until the ingredients are combined.
If your dough feels too dry, add a teaspoon of water or milk. If it’s too wet, sprinkle in a bit more flour. Adjusting the texture ensures your bake turns out perfectly every time.
Mastering dough consistency takes practice, but it’s worth the effort. With these tips, you’ll create treats that are soft, chewy, and absolutely delicious.
The Role of Butter and Sugars
The right combination of butter and sugar can make or break your bake. These ingredients are the foundation of texture and flavor. Understanding how to use them ensures your treats turn out perfectly every time.
Melted vs. Softened Butter
The type of butter you use affects the dough’s texture. Melted butter creates a denser, chewier result. Softened butter, on the other hand, is ideal for creaming with sugar to achieve a lighter texture
Here’s a quick comparison:
Type of Butter
Effect on Dough
Melted Butter
Denser, chewier texture
Softened Butter
Lighter, fluffier texture
The Creaming Process
Creaming butter and sugar together incorporates air into the dough. This step is crucial for a tender, airy texture. Mix until the mixture is light and fluffy, but avoid overmixing to prevent toughness.
Brown Sugar’s Role
Brown sugar adds moisture and a rich, caramel-like flavor. It enhances the chewiness, making your bake soft and satisfying. Pair it with granulated sugar for the perfect balance of texture and sweetness.
Vanilla and Salt
A touch of vanilla enhances the overall flavor profile. It complements the sweetness while balancing the savory note of salt. A pinch of salt also heightens the other flavors, creating a well-rounded taste.
“The creaming process is where the magic happens. It’s the key to achieving that perfect texture.”
Creating the Perfect Chocolate Chip Cookies
Creating the perfect treat starts with mastering the basics. The process is simple, and you don’t need to wait for dough to chill. Start by combining your wet and dry ingredients. Cream softened butter with sugars until light and fluffy. This step is crucial for a tender texture.
Next, add the dry ingredients gradually. Mix just until combined to avoid overworking the dough. Overmixing can lead to tough results. The key is to keep the process straightforward and efficient.
Now, it’s time for the star of the show: the chocolate. Add lots of it for extra gooey bites. Generously folding in chocolate ensures every bite is rich and satisfying. This step is what makes the best chocolate chip cookies unforgettable.
Here’s why this method works:
Combining ingredients properly ensures even texture.
No chilling means you can enjoy warm treats faster.
Adding ample chocolate guarantees a decadent experience.
Follow these steps, and you’ll have a cookie recipe that’s consistent every time. Make it a regular part of your baking routine, and you’ll always have a crowd-pleasing treat ready to go.
Step-by-Step Mixing Process
Mixing ingredients correctly is the foundation of a great bake. The process ensures your dough has the right texture and consistency. Follow these steps to achieve perfect results every time.
Combining Wet and Dry Ingredients
Start by creaming softened butter with sugars until the mixture is light and fluffy. This step incorporates air, which helps create a tender texture. Next, add the egg and vanilla, mixing until fully combined. Be careful not to overmix at this stage.
In a separate bowl, whisk together the dry ingredients, including flour and baking soda. Gradually add this mixture to the wet ingredients. Mix until just combined to avoid overworking the dough.
Overmixing can lead to tough results, so stop as soon as the ingredients are incorporated. The dough should be slightly sticky but easy to handle. This ensures a soft and chewy texture in the final bake.
Finally, fold in the chocolate chips gently. Use a spatula to distribute them evenly throughout the dough. This step guarantees every bite is packed with flavor and texture.
“The key to perfect dough is mixing just until combined. Overmixing can ruin the texture.”
By following these steps, you’ll create a cookie recipe that’s consistent and delicious. Whether you’re a beginner or an experienced baker, this method ensures success every time.
Tips for Rolling and Scooping Dough
Consistency is the secret to baking success, and it starts with how you handle your dough. Uniformity in size ensures even baking and a professional presentation. Whether you’re a beginner or a seasoned baker, these tips will help you master the art of shaping dough.
Why Use a Cookie Scoop?
A cookie scoop is a game-changer for achieving consistent sizes. It ensures each ball of dough is the same, which is crucial for even baking. Without it, you risk some cookies being undercooked while others are overdone.
Rolling Dough into Uniform Balls
If you don’t have a scoop, rolling dough by hand works too. Use a measuring cup to portion the dough, then roll it into smooth balls. This method takes a few extra minutes, but the results are worth it.
Spacing for Perfect Baking
Proper spacing on the baking sheet is key. Leave about 2 inches between each ball to allow room for spreading. This ensures your bake turns out evenly, with no cookies merging together.
Baking Time and Consistency
Uniform size directly impacts baking time. Smaller dough portions bake faster, while larger ones take longer. Keep an eye on the oven to avoid overbaking. Consistency in size ensures every cookie has the perfect texture and taste.
“A cookie scoop isn’t just a tool—it’s your secret weapon for bakery-quality results.”
Tool
Benefit
Cookie Scoop
Ensures uniform size
Measuring Cup
Portions dough accurately
Baking Sheet
Provides even heat distribution
By following these tips, you’ll create a bake that’s not only delicious but also visually appealing. Take your time, and enjoy the process—it’s worth every minute.
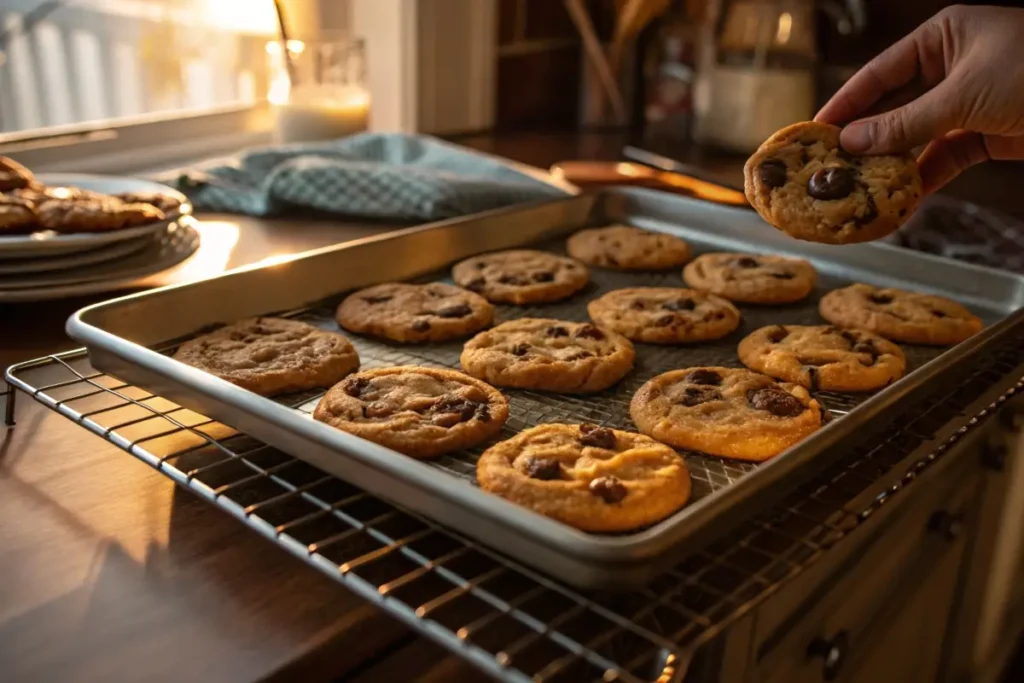
Baking Techniques for Soft and Chewy Texture
Soft, chewy, and fresh from the oven—chocolate chip cookies at their best
Timing and temperature are the secrets to soft and chewy results. Mastering these elements ensures your treats come out perfectly every time. Let’s dive into the techniques that make all the difference.
Avoiding Overbaking
One of the most common mistakes is leaving your bake in the oven too long. Overbaking can dry out the center, making it tough instead of tender. To avoid this, remove your treats when they still look slightly underdone. They’ll continue to set on the baking sheet, ensuring a soft and chewy texture.
Here’s a quick tip: The edges should be lightly golden, while the center remains soft. This balance guarantees the perfect bite every time.
Oven Temperature Tips
Your oven’s temperature plays a crucial role in achieving the right texture. If it’s too hot, your bake will spread too much and become crispy. If it’s too low, the result may be dense and undercooked. Always preheat your oven to the recommended temperature for consistent results.
Using an oven thermometer can help you verify the accuracy of your settings. This small tool ensures your bake is cooked evenly and at the right heat level.
“The final few minutes in the oven are critical. Watch closely to avoid overbaking.”
By following these tips, you’ll create a recipe that’s both soft and satisfying. Remember, small adjustments in timing and temperature can make a big difference in your bake.
How to Handle Frozen Dough and Storage
Freezing dough is a game-changer for quick and easy baking. Whether you’re planning ahead or saving leftovers, proper storage ensures your dough stays fresh and ready to use. Here’s how to make the most of your freezer and keep your dough in perfect condition.
Freezing Dough Tips
Flash-freezing is the best way to preserve dough for later use. Start by portioning your dough into individual balls. Place them on a baking sheet lined with parchment paper, ensuring they don’t touch. Freeze for about 1-2 hours until solid.
Once frozen, transfer the dough balls to an airtight container or a resealable freezer bag. Label the container with the date to keep track of freshness. This method prevents freezer burn and keeps your dough ready for baking anytime.
Optimal Storage Methods
For long-term storage, an airtight container is essential. It protects your dough from moisture and odors in the freezer. If you’re short on space, a resealable bag works just as well. Remove as much air as possible before sealing.
When you’re ready to bake, you have two options: thaw the dough in the fridge overnight or bake it directly from the freezer. Baking from frozen adds a few extra minutes to the cooking time but delivers the same delicious results.
Here’s a quick guide to storage durations:
Freezer: Up to 3 months for optimal freshness.
Room temperature: Store baked treats in an airtight container for up to 5 days.
With these tips, you’ll always have a ready supply of dough for unplanned cravings. Freezing dough not only saves time but also ensures you’re always prepared for a baking session.
Troubleshooting Common Baking Issues
Even the best bakers face challenges in the kitchen. Whether your treats are flattening or the flavors seem off, there’s always a way to fix it. Let’s explore common problems and how to solve them.
Why Cookies Flatten
Flat treats can be frustrating, but the cause is often simple. Expired leavening agents like baking soda or baking powder are a common culprit. To test their freshness, mix a teaspoon with vinegar. If it doesn’t bubble, it’s time to replace it.
Overmixing the dough can also lead to flattening. Mix just until the ingredients are combined to avoid overworking it. Warm ingredients, like melted butter, can cause spreading too. Use softened butter instead for better results.
Correcting Ingredient Imbalances
Balancing your ingredients is key to a successful bake. Too much flour can make the dough dry, while too little can cause it to spread. Use the spoon-and-level method to measure flour accurately.
If your bake tastes too sweet or bland, adjust the sugar or salt levels. A pinch of salt can enhance flavors, while reducing sugar can balance sweetness. Always taste your dough before baking to ensure the flavors are just right.
“Small adjustments in ingredients and technique can transform your bake from good to great.”
Checking Oven Temperature
An inconsistent oven can ruin your bake. Use an oven thermometer to verify the temperature. If it’s too hot, your treats may burn; if it’s too low, they won’t bake properly. Adjust the settings as needed for consistent results.
By addressing these common issues, you’ll improve your baking skills and enjoy better results every time. Remember, practice makes perfect, and every challenge is an opportunity to learn.
Flavor Variations and Ingredient Substitutions
Exploring new flavors can take your baking to the next level. Whether you’re adding a crunchy texture or experimenting with alternative sweeteners, there are endless ways to customize your recipe. Let’s dive into some creative options to make your bake uniquely yours.
Adding Nuts for Extra Crunch
Nuts like walnuts or pecans can add a delightful crunch to your recipe. They also bring a rich, nutty flavor that complements the sweetness. To ensure the texture stays perfect, chop the nuts finely and fold them into the dough gently.
Here’s a quick guide to using nuts effectively:
Nut Type
Flavor Profile
Walnuts
Rich, earthy
Pecans
Buttery, sweet
Alternative Sweeteners and Mix-ins
If you’re looking to reduce sugar or try something new, alternative sweeteners like honey or maple syrup can work wonders. They add a unique flavor while keeping the texture soft and chewy. Just remember to adjust the liquid ingredients slightly to maintain balance.
For mix-ins, consider options like peanut butter or dried fruit. These additions can add depth and variety to your bake. A touch of vanilla can also enhance the overall flavor profile, making each bite more memorable.
Here are some tips for substitutions:
Replace butter with coconut oil for a dairy-free option.
Use applesauce instead of eggs for a lighter texture.
Experiment with brown sugar variations for a richer taste.
Maintaining balance is key when substituting ingredients. For example, reducing sugar might require adding a bit more liquid to keep the dough moist. Always test small batches to find the perfect combination for your taste.
Don’t be afraid to experiment with mix-ins. Whether it’s a handful of nuts or a drizzle of peanut butter, these small changes can make every batch feel special. The possibilities are endless, so have fun and create something uniquely yours.
Serving Suggestions and Presentation
Presentation can turn a simple treat into a memorable experience. Pairing your freshly baked cookies with a glass of cold milk or a warm cup of coffee creates a delightful snack. This classic combination is perfect for any day, whether you’re enjoying a quiet moment or hosting friends
Creative plating ideas can elevate your homemade charm. Use elegant serving dishes or rustic trays to showcase your bake. Adding a sprinkle of powdered sugar or a drizzle of caramel sauce can make your presentation even more inviting. A warm ambiance, like soft lighting or candles, enhances the experience.
Proper presentation transforms even the simplest cookie into a special treat. Take the time to arrange your bake thoughtfully, and it will feel like a celebration. Sharing photos of your creations on social media is a good way to inspire others and celebrate your baking success.
“A beautiful presentation makes every bite taste even better.”
Here are a few tips to make your serving stand out:
Use seasonal decorations to match the occasion.
Add fresh fruit or herbs for a pop of color.
Serve on tiered stands for a bakery-style display.
By focusing on presentation, you’ll create a lasting impression. Whether it’s a casual post-dinner treat or a special day celebration, thoughtful serving ideas make all the difference.
Additional Baking Tips and Tricks
Mastering baking techniques can elevate your results, no matter the conditions. Whether you’re adjusting for high altitude or using a convection oven, these tips ensure consistent success. Let’s explore how to tackle unique challenges and perfect your bake.
High Altitude Baking Adjustments
Baking at high altitudes can be tricky. The lower air pressure affects how your dough rises and bakes. To compensate, reduce baking powder or soda by 1/8 to 1/4 teaspoon per cup of flour. This prevents over-rising and spreading.
Increase the oven temperature by 15-25°F to set the structure faster. Adding an extra minute or two to the time can also help. These small changes ensure your bake turns out perfectly, even in challenging conditions.
Using Convection Ovens Effectively
Convection ovens circulate hot air, which speeds up cooking and ensures even baking. When using one, reduce the oven temperature by 25°F and check your bake a few minutes earlier than the recipe suggests. This prevents overbaking and keeps the texture just right.
If your oven has a fan setting, use it for consistent results. Convection baking is ideal for achieving a golden exterior and soft interior. Experiment with small batches to find the perfect balance for your oven.
Here are a few insider tricks to keep in mind:
Measure ingredients precisely, especially flour, using the spoon-and-level method.
Test your leavening agents for freshness to avoid flat results.
Adjust time and temperature based on your oven’s performance.
By applying these tips, you’ll handle any baking challenge with confidence. Small adjustments can make a big difference in your final product.
Conclusion
Baking the perfect treat doesn’t have to be complicated. By following this recipe, you’ll achieve soft, chewy results every time. From measuring ingredients to mastering the dough consistency, each step is designed for success.
Remember, the key is to avoid overbaking. Pull your bake from the oven when the edges are golden but the center is still soft. This ensures a tender texture that’s hard to resist.
Share your creations with loved ones to make the experience even more special. This cookie recipe isn’t just about the final product—it’s about the memories you create along the way.
Feel free to experiment with flavors and mix-ins to make it uniquely yours. And if you ever need a refresher, revisit this guide for tips and tricks. Happy baking!
FAQ
What makes this recipe perfect every time?
This recipe uses precise measurements and techniques, like combining wet and dry ingredients properly, to ensure consistent results. Following the steps carefully guarantees soft, chewy cookies every time.
Why is butter temperature important in this recipe?
Butter temperature affects the dough’s texture. Softened butter creates a creamier mix, while melted butter can lead to flatter cookies. The recipe specifies the best option for the desired outcome.
How do I measure flour correctly for the dough?
Spoon the flour into a measuring cup and level it off with a knife. Avoid packing it down, as too much flour can make the dough dry and dense.
Can I freeze the dough for later use?
Yes, you can freeze the dough. Scoop it into balls, place them on a baking sheet to freeze, then transfer to an airtight container. Bake directly from the freezer, adding a minute or two to the baking time.
What’s the best way to store baked cookies?
Store them in an airtight container at room temperature for up to 5 days. For longer storage, freeze them in a sealed bag or container.
How do I prevent my cookies from flattening?
Ensure your butter isn’t too soft or melted, and avoid overmixing the dough. Chilling the dough before baking also helps maintain shape.
Can I substitute ingredients in this recipe?
Yes, you can experiment with mix-ins like nuts or alternative sweeteners. However, changes may affect texture and flavor, so adjust carefully.
What’s the ideal oven temperature for baking?
Preheat your oven to 350°F (175°C) for even baking. Use an oven thermometer to ensure accuracy, as ovens can vary.
How do I achieve a soft and chewy texture?
Avoid overbaking by removing the cookies when the edges are golden but the centers are still soft. Let them cool on the baking sheet for a few minutes before transferring to a rack.
Can I use a convection oven for this recipe?
Yes, but reduce the temperature by 25°F and monitor baking time closely, as convection ovens cook faster and more evenly.
I’m Chef Betty, your guide to the joy of homemade cooking. Inspired by generations of tradition, I bring you easy-to-follow recipes that make home-cooked meals simple, stress-free, and full of flavor. Whether you’re a beginner or an experienced cook, Grandma Meals is here to help you create delicious dishes that bring people together—one meal at a time!